Tutorial: New Features in Adobe Premiere Pro CC
今天,Adobe宣布了将在NAB上首次亮相的所有Creative Cloud视频应用程序的更新. Here are details on the updates, 加上四个关键的新功能的视频教程在Premiere Pro CC:主剪辑, Live Text, Masking and Tracking, and new 4K format support.
在本教程中,我将向您展示Adobe Premiere Pro CC中的四个关键新功能. First is Master Clips.
Master Clips
As you can see in Figure 1 (below)在Twirls序列中,我已经使用了Twirls剪辑4次. Reviewing the footage in the timeline, 看起来它可以使用更多的亮度和对比度. With previous versions of Premiere Pro, 我必须分别为时间轴上的每个剪辑实例添加亮度和对比度调整.

Figure 1. Twirls剪辑在这个时间轴上出现了4次. Click the image to see it at full size.
新的Master Clips功能可以让我更快地进行调整.
首先,我在项目面板中选择Twirls剪辑,然后按F键在源监视器中打开它. Then I click the Effects tab and choose Video Effects > Color Correction > Brightness & 对比并拖动到项目面板中,并将其放在Twirls剪辑上. 现在,如果我转到效果控制面板,我可以看到亮度 & 项目面板中的Twirls添加了对比效果(而不仅仅是时间轴中选定的剪辑).
Now, 如果我对项目面板中的Twirls剪辑进行亮度调整(一个过度的调整来强调这一点), as shown in Figure 2, below),调整将反映在时间轴上剪辑的所有实例中.

Figure 2. 我在项目面板中对Twirls剪辑进行的亮度调整已应用于序列中剪辑的所有实例. Click the image to see it at full size.
这个新功能是非常方便的,如果你使用一个剪辑在多个地方,需要应用一个调整到所有的地方,它出现在你的项目.
Masking and Tracking
Next up is Masking and Tracking. 基本上,Premiere Pro中的每个效果现在都带有遮罩. 假设我想对我剪辑中的舞者做一个证人保护程序效果,模糊她的脸. For this I’ll use the Mosaic effect. I choose Effects > Video Effects > Stylize > Mosaic, then drag it onto the clip in the timeline, as I would in previous versions of Premiere Pro.
当我打开效果控制面板自定义效果, 直接在马赛克下,我看到椭圆和方形按钮(Figure 3, below),允许我创建一个椭圆或正方形蒙版,并应用这样的效果.

Figure 3. 将椭圆按钮夹在效果下面创建一个椭圆蒙版.
当我点击椭圆按钮时,Premiere Pro在剪辑中创建一个蒙版,如下所示 Figure 4 (below).
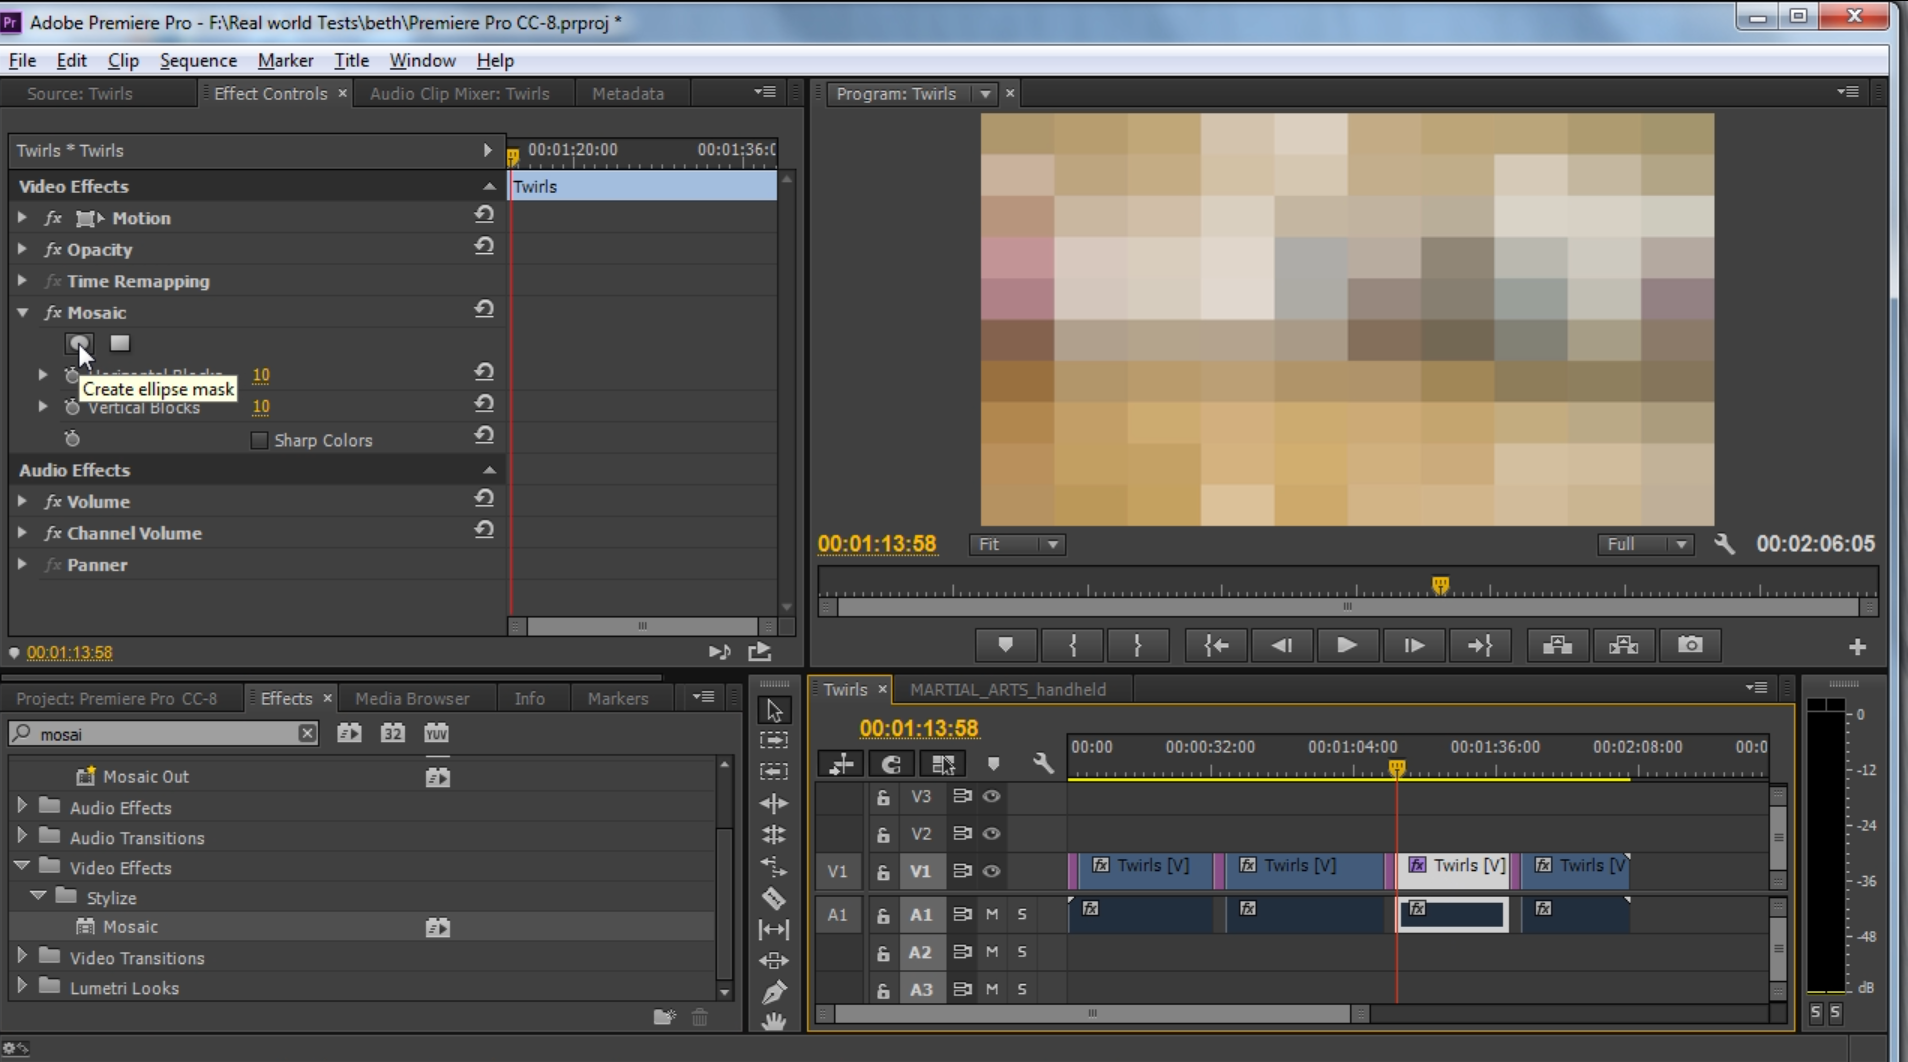
Figure 4. The ellipse mask applied to the clip. Click the image to see it at full size.
Next, 我放大了图像,并使用椭圆上的边界控件(Figure 5, below).

Figure 5. The ellipse mask resized to cover only the face.
到目前为止,我们所做的只是隔离了她脸上的面具. 这在这个特定的画面里效果很好,但是当她移动的时候? That’s the tracking part of the effect.
To track the mask, go back to the Effect Controls panel, and under Mosaic > Mask, 点击蒙版路径右侧的播放按钮, aka “Track selected mask forward” (Figure 6, below).

Figure 6. Click here to track the mask.
A Tracking progress window will open, 以前在After Effects中执行的过程现在在Premiere Pro中执行. 随着跟踪过程的进行,你可以看到面具跟踪对象的运动. 正如您可以在本文开头的视频中看到的2点58分左右, as the dancer starts moving around the floor, the mask more or less follows her face. If you see it go moff course, you can stop the process, 通过手动将面具移回她的脸部位置来纠正它, 然后再次单击播放按钮以在您停止它的位置恢复跟踪.
Once the process is complete, 当舞者在地板上移动时,你可以看到面具跟随她的脸. 所以,你不仅得到了屏蔽效果,还得到了跟踪效果. 在以前的版本中,你必须使用After Effects来跟踪蒙版.
Related Articles
本教程演示了如何使用After Effects alpha哑光使您的视频“通过”文本发光.
新的After Effects功能包括额外的键控效果, Kuler integration, and the ability to create live text templates and to share masks with Premiere Pro; Photoshop gets more powerful Smart Objects, 改进的图层对比和内容感知技术, Blur Gallery motion effects, and a Focus Mask
新闻包括Adobe Premiere Pro CC和Adobe After Effects CC的主要更新以及Adobe Anywhere的新功能, 协作工作流程平台,使使用Adobe专业视频应用程序的团队能够在几乎任何网络上访问和管理集中的媒体和资产时协同工作
In this tutorial, 我们将看看如何与TechSmith Camtasia创建屏幕截图, 然后将它们导入到Adobe Premiere Pro中,将它们合并到您现有的Premiere Pro项目中,以创建无缝结合屏幕截图和高清镜头的专业质量教学视频.
这里有三个快速的技巧,将简化你的标题工作流程在Premiere Pro中,当你创建你喜欢的风格,并希望使用他们一致,而不是每次重新发明他们.
New SpeedLooks in SpeedGrade, Mask Tracker in After Effects, Sync Settings in Adobe Media Encoder, improved multicam in Premiere Pro, expanded UltraHD/4k support, and more
使用Adobe Lightroom 5对单反视频文件进行色彩分级和应用元数据既简单又高效,可以使现场切换者进行最少的编辑, editing novices, 专业编辑探索非传统的工作流程.
而After Effects可能会让一些Premiere Pro编辑望而生畏, 这里是一个易于遵循的工作流程,可以使您的文本和标题充满活力,并在Adobe Bridge中找到预构建动画, applied in a few simple steps in After Effects, 并直接导入到您的Premiere Pro时间轴.
最近升级到Adobe CC可以很容易地在Adobe Premiere Pro CC中应用分级外观,并通过Premiere Pro CC和SpeedGrade CC之间的无缝往返匹配不同色温的镜头.
在最后一轮音频编辑冠军iZotope RX 3和Adobe Audition CC之间, 我们比较了两种音频编辑器的降噪和混响/回声减少.
In this first installment of a two-part series, Jan Ozer比较了iZotope的新RX 3专业音频编辑器中的衰减和裂纹和pop-removal功能,以Adobe Audition CC中的并行功能.
Exploring 3 new key features in Audition CC, 最新版本的Adobe专业音频编辑应用程序:消除嗡嗡声和其他不需要的可变频率噪音的声音去除, 响度雷达仪表,用于匹配和坚持广播音量标准, and Automatic Speech Alignment for ADR.
如果你发现自己不得不从Premiere Pro渲染多个序列, 有一种比使用Premiere Pro Export控件更简单的方法. 本教程将解释更容易和更有效的方式使用Adobe媒体编码器.
这里是一个快速教程的Premiere Pro CC用户如何迁移编码预设,您创建自定义和精简编码在Adobe Media Encoder CS5/6到Adobe Media Encoder CC,这样你就可以捡起你离开的地方.
在本教程中,您将学习如何使用刚刚发布的Adobe Premiere Pro CC中的新封闭字幕功能创建和编辑行业标准的视频封闭字幕.
两种类型的噪音会降低你拍摄视频的音频:一种是随机的噪音,比如麦克风的咔哒声和砰的一声, 以及持续的噪音,比如白噪音或空调嗡嗡声. 本教程演示如何在Adobe Audition CS6中删除它们.